Saving Excel spreadsheet tables as tab-delimited text files
All of the software we provide uses plain text files as input; they cannot use Excel spreadsheets or any other format. This page describes in detail how to convert an excel spreadsheet into a suitable text file. These instructions were set up under Windows but for MacOS X it should be similar.
First make sure you know about the following important points.
- Your original Excel file will not be affected by this procedure, because you are saving a copy of the file.
- The worksheet you are viewing now is the one which will saved. Other worksheets are not saved.
- All row and column names must not contain spaces. This is because our parsers may get confused by names containing spaces.
- Missing values should just look blank; avoid putting spaces or other characters in any fields.
- The values in the file, other than the row and column labels, must be numbers (no letters or other characters)
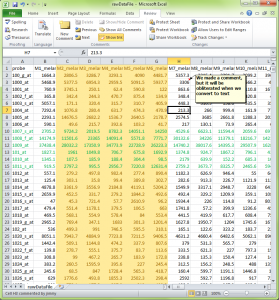
Here is what a reasonable spreadsheet might look like in Excel before you save it as text. Note that all the pretty formatting will be lost when you save it as text. If you open the saved text file in excel again, the colors, formulas, etc. will be gone. So make sure you have already saved the file as an “xls” document.
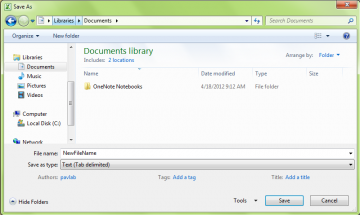
From the file menu, select “Save as…”. You should see the following dialog box. Select “text (tab delimited)” from the pull down menu. Fill in the file name you want to use. Remember that Unix file names cannot contain spaces or other cetain ‘special’ characters. (Details about unix are beyond the scope of this tutorial).
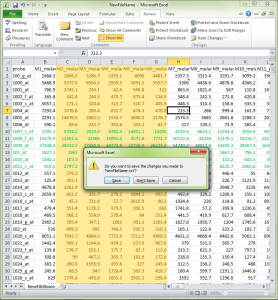
Then, for some silly reason, Excel shows you the following dialog box. Click “yes”.
If you now close the document, Excel will usually give you the following prompt. Select “no” (otherwise you go back to the beginning again).
That’s it, you’re done.


