Viewing, defining and modifying gene sets
A gene set is any grouping of genes defined by criteria other than the data currently being analyzed. Our baseline gene sets are defined using Gene Ontology terms as applied in the publicly available sources listed on the GO web site.
You can view, import, define, or modify gene sets as you like, using the “gene set” menu on the main panel of the software. This page explains how.
Viewing a gene set
When the software first starts, the gene sets are defined by the gene annotation file you uploaded. Prior to doing any analysis, or at any other time, you can view the list of genes in a gene set in one of three ways.
-
You can “right click” on the gene set name and select “Modify this gene set…”. You will be shown the details for that gene set in a new window. If you are just looking, and don’t want to modify the gene set, just hit cancel when you are done.
-
You can select the “View/Modify gene set” from the “Gene Sets” menu. In this case you then select which gene set to view.
- You can double-click on the gene set name to bring up the visualization of the gene set
The first two options are appropriate if you want to modify the gene set.
Creating a new gene set from scratch
Select “Define New Gene Set” from the “Gene Sets” menu. This gets you to the define new gene set wizard.
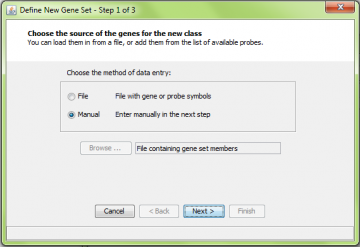
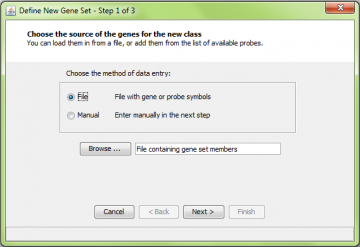
You can import a file describing a gene set, or you can create one manually from the list of genes on the array you are using. You choose which to use by selecting “File” or “Manual” in the first step of the new gene set wizard:
Adding new genes manually
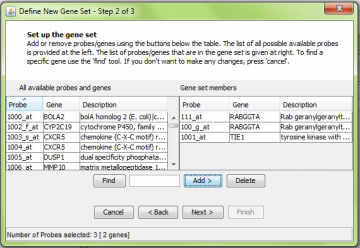
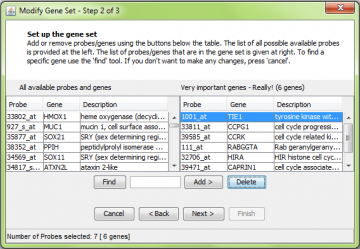
Select probes from the left panel and click “Add” to move them to the right panel. Note that here we added one probe for the RABGGTA gene, but two probes were moved to the right. This is because there are two probes which assay RABGGTA; all of them are added to the gene set automatically. Similarly you can delete probes from the right panel by using the “Delete” button.
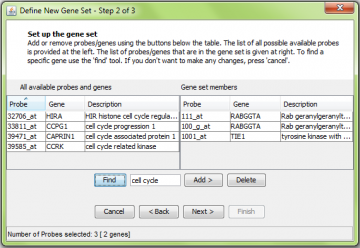
Using the ‘find’ function to help locate genes.
To make it easier to build new gene sets, a ‘find’ function is provided. Here we searched for “cell cycle”.
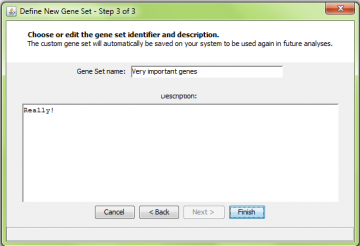
Giving the new gene set a name and description
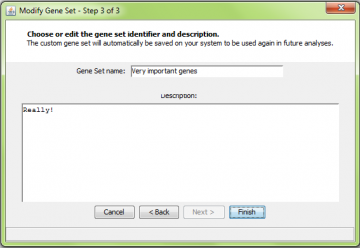
After adding the probes and genes to the gene set and hitting “Next”, you will be asked to enter a new identifier and description for the gene set you defined. When you hit “Finish”, the information about this gene set is saved to disk and you are returned to the main panel.
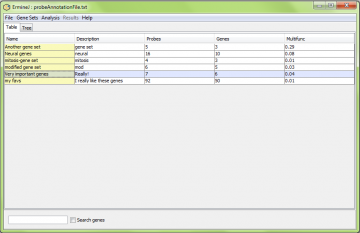
After hitting “Finish”, the new gene set is shown in color in the output panel. The gene set is also saved to disk for future use. The format and file locations are described here.
If you can’t see the new gene set on the output panel, press “Ctrl-U” to hide all but the user-defined gene sets. Hitting “Ctrl-U” again shows all the gene sets.
Entering a gene set from a file
Gene sets can be loaded in from files created by the user. For details on the format, see this page. But basically it is just a list of genes, one per row.
Select the load from “File” option:
After loading a gene set, you will be able to check modify it before giving it a name and saving it to disk.
Modifying an existing gene set
You can modify a pre-existing gene set by adding or removing genes. This is done using the “Modify Gene Set” wizard. This can be accessed either by right-clicking on the gene set in the Output Panel or by selecting the “View/Modify Gene Set” item from the “Gene Sets” menu.
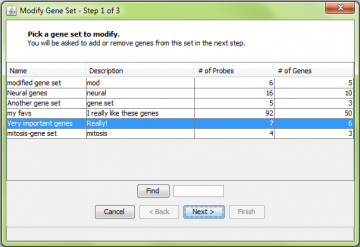
If you use the “Gene Sets” menu, you will get a list of all the available gene sets. Select one and click “Next”. You can use the find function to help locate a specific set. After this step, the procedure is very similar to the “create new” gene set procedure explained above.
The next screen lists the available probes on the left, and the probes in the set on the right. Similar to the ‘create new gene set’ procedure shown above, you can add or delete probes.
If you change the name of a gene set once it is created, you will create a new gene set with the new name. This will not occur if you change the gene set’s description.
Note!: If you rename a Gene Ontology gene set, next time you start the software, your redefined gene set will always replace the one defined in the GO OBO file. See below.
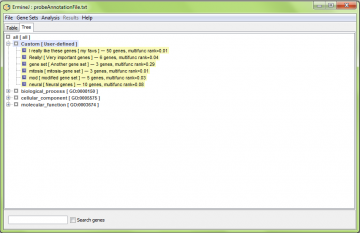
As for new gene sets, the modified gene sets are shown on the main panel in a different color to indicate they were modified by the user. Use “Ctrl-U” to make them show up on their own, or look in the “User-defined” section of the tree panel.
I don’t like my gene set, how do I get rid of it?
You can delete user-defined gene sets using the popup menu in the table or tree view. You cannot delete gene sets that were loaded as part of the Gene Ontology. In the case where you have modified a gene set but not changed its identifier, you can “reset” it to its previous state.
Gene sets can also be deleted manually by finding the place where ermineJ stores gene sets (in your home directory, under ermineJ.data/genesets) and delete the files by hand.
